Amazon FreeRTOS Workshop

Amazon Freertos workshop using the M5 StickC
View the Project on GitHub onsankawai/amazon-freertos-m5stickc-workshop
Build the code on your laptop
Clone the repository
Main code can be found on the repository page: github.com/onsankawai/amazon-freertos-m5stickc-workshop
git clone https://github.com/onsankawai/amazon-freertos-m5stickc-workshop.git --recurse-submodules workshop
Note: from now on, we’ll assume your bash is in the workshop folder
Setup your credentials
Create the aws_clientcredential_keys.h
Navigate to https://yona75.github.io/credformatter/, upload your Certificate and Private key that you downloaded in the previous step and generate an aws_clientcredential_keys.h file.
Copy aws_clientcredential_keys.h to project
Copy the file to ./amazon-freertos/demos/include/ directory by dragging it there
Edit aws_clientcredential.h
Open the aws_clientcredential.h file by double-clicking on it. And change the following values:
...
#define clientcredentialMQTT_BROKER_ENDPOINT "[YOUR AWS IOT ENDPOINT]"
...
#define clientcredentialIOT_THING_NAME       "[THE THING NAME YOU CREATED]"
...
#define clientcredentialWIFI_SSID            "[YOUR WIFI SSID]"
...
#define clientcredentialWIFI_PASSWORD        "[YOUR WIFI PASSOWRD]"
...
#define clientcredentialWIFI_SECURITY        eWiFiSecurityWPA2
...
Note: clientcredentialWIFI_SECURITY is defined without double quotes
Setup the code
As of now, we move the code to the amazon-freertos folder structure to maintain most of the dependencies.
mv ./m5stickc ./amazon-freertos/vendors/espressif/boards
Note: TODO: see how to leverage cmake in order NOT to have to do this
Connect your board to your laptop
Find the USB device
ls /dev/cu.*
Should return something like: /dev/cu.usbserial-29568143B4
Make a note of the “/dev/cu.usbserial-29568143B4” (copy)
Configure the code
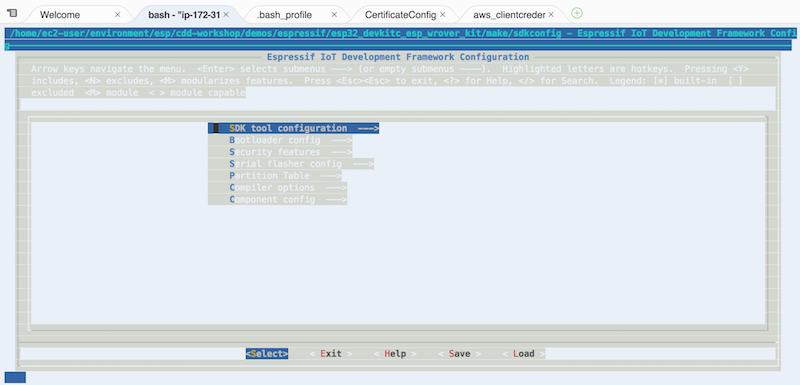
Run make menuconfig and configure the serial port.
cd ./amazon-freertos/vendors/espressif/boards/m5stickc/aws_demos

make menuconfig
- Select “Serial flasher config”
- Set the serial port to: [YOUR /dev/cu….]
- Save and then Exit

Compile, flash and monitor the code
make all -j4 && make flash && screen /dev/cu.... 115200 -L
Note: replace /dev/cu…. by your specific serial port